Showing posts with label useful tips. Show all posts

Wednesday, December 10, 2025

Is it time to replace your bicycle?

 It is time to upgrade your bicycle when you have outgrown it in size. However, if the condition of the bicycle is good, you can repair it and pass it down to other members in the family, who are tall enough to ride it.

Do you still have the “Bicycle Owner’s Manual” for the bicycle you are currently cycling on? If you refer to the manufacturer’s bicycle sizing guide, you will be able to find out if your bicycle is still in the right wheel size or frame size for your age or height. Here is one I extracted from a manual issued for Apollo bike owners.


You can see the frame size marked on the seat tube of your bicycle, as shown below:

The tyre size is marked on the sidewall as shown below:


Click on the following link if you want to learn more:

How do you read a bicycle tyre size?

Sometimes we received bicycles from owners which require major repairs that are costly. Based on the condition of their bicycles and the age or height of the rider, we may advise our customer against proceeding, if the total for replacement parts and the service fee is close to the price of a new bicycle.

Our customers will still consider costly repair for bicycles that are branded and of good quality:

-so that younger siblings in the family can continue to ride on them.
-as it has sentimental value; it being a bike one of the parents had cycled as a kid.
-as it is an antique bike passed down as a gift from a loved one who has passed away.

Some of our customers repair bicycles their children have outgrown so that they can give them away to a charitable organisation.

Bring your bicycle to your local bike shop to have it appraised. If you like your bicycle, check with them if some minor changes that are not costly can be made to your bicycle to make your rides more comfortable, now that you are taller.  You can click on the following link to find out what I mean.

How do I get the bike fit done? 

If the attendants at the bike shop are not able to give you the advice you need or you are advised to replace it, you can refer to the following table for other types of bicycle available in the market. It will also help you to decide if you should replace your current bike.


Saturday, November 15, 2025

How do I learn to cycle?

This is a fun way to learn to cycle without training wheels:

1) Find a park with grassy slopes.

2) Slide down the slope on your bicycle to learn how to balance yourself on it.

3) Once you are confident; start pedalling as the wheels build up momentum, rolling down the slope.

Keep repeating that process and you will soon get the hang of it. Once you are able to keep your balance on the bike, click on the following link to learn how to mount and dismount from your bike:

How to get on and off your bike correctly

However, before you even start on that, make sure that you have got yourself a bicycle suitable for your height.

How can I choose the best bike for my children?

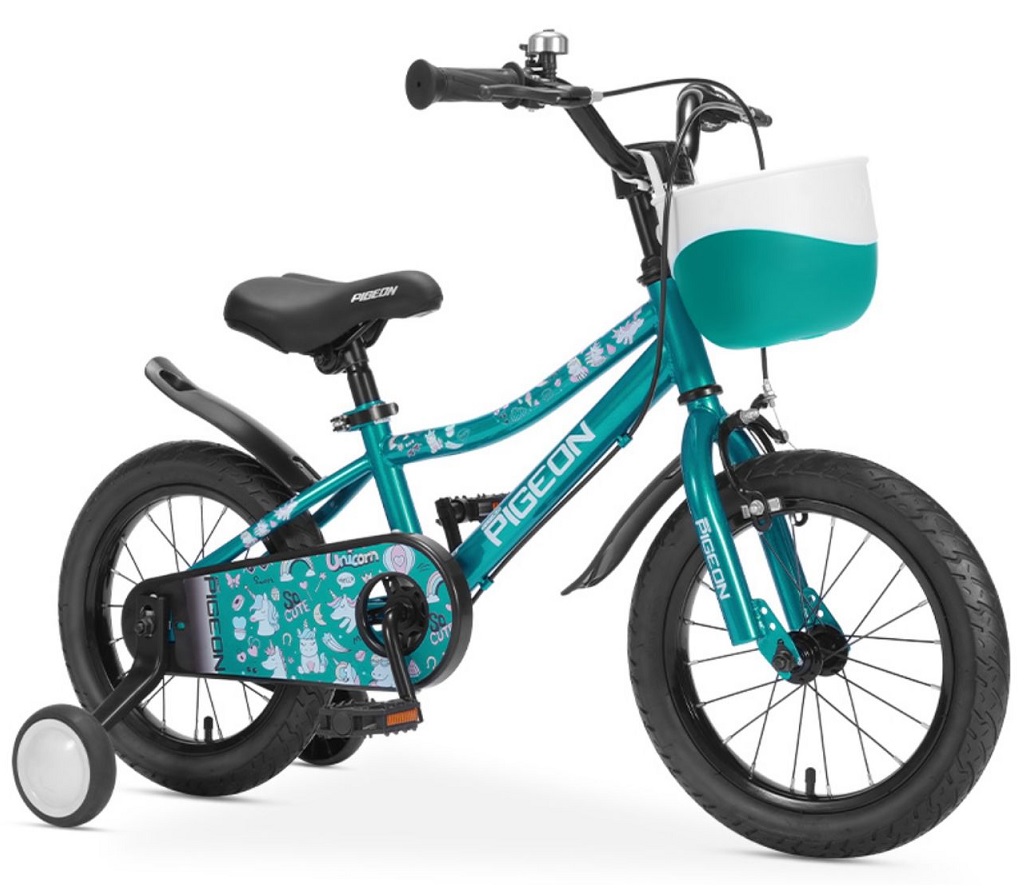
This chart provides a general idea of the type and wheel sizes of bicycles your children can ride on, based on their age.


The best bike, from your children’s point of view, will be the one that is:

-suitable for their age as one that is too big scares them.
-in the colours that they like.
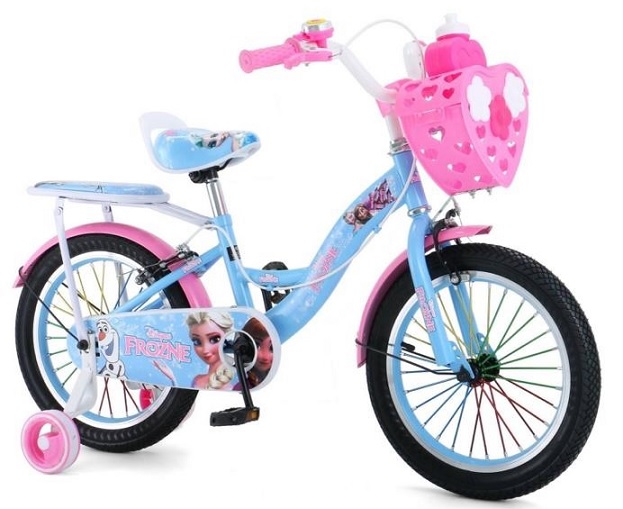
-printed with images of their favourite cartoons (for the younger ones).
-similar to that their friends are cycling on (for the older kids).
-meet their purpose, example, BMX for kids who enjoy performing tricks or road bike or fixie for those who enjoy speeding down the road on large wheels or MTBs for those who like to cycle on rough terrains.

From different parents’ point of view (I have met many), the best bicycle for their children will be the one:

-that is safest to ride on, which is usually smaller in size than the one recommended by the bike shop
because they are worried that their children cannot handle them and will be hurt.
-that is the cheapest one in the shop because they are frugal or they have a budget to meet.
-that is easy or not costly to maintain, example, with no gear components installed because they do not trust that their children will take care of the bike well.
-that can also be ridden by other members in the family because they are practical or there are too many members in the family to get each child a bike.
-that have more accessories installed like carrier, mudguards, bell and basket.
-that comes with lots of free gifts like helmet, bell and lights.

From a bike shop owner’s point of view, the best bike for children will be one:

-that the child can ride over a longer period of time (but that is bad for my business).
-that can be shared amongst siblings and, if possible, adults in the family (but that is bad for my business).
-that are installed with carrier, basket , mudguards, bell, front and rear light for children who rides to school or run errands on them.

If you are looking in that direction, consider getting adult folding bikes for your children. As you can see, the seat post and stem height on a folding bike are adjustable to cater to riders of various heights.  This also allows the cyclist to sit in a more upright position.


So, an adult folding bike in wheel size of:

-12″ and 14″ can be ridden by a child age 4.
-16″ can be ridden by a child age 5 and above.
-20″ can also be ridden by a child age 6 till adulthood.

Also, the handlebars on some folding bicycles can be removed if they are bolted on to the stems or there is a quick release mechanism to release them from their stems.


If the distance from the seat to the handlebar is too far to reach. it allows the parent to replace the current handlebar to one that is curved towards a shorter rider in the family.
There are adult bicycles in the market with smaller wheel size that their children can also ride on. This is a 16″ wheel size bicycle made for the Japanese market. A child age 5 or above should be able to ride on it.


This is also made for the Japanese market. Its rear wheel is 16″ while the front is 24″.


Some 20″ wheel size bicycles for children can also be ridden by adults. A child age 6 should not have any problem cycling on a 20″ wheel size BMX.  
However, if the top tube length is too long, the handlebar can be pushed towards a shorter rider to enable him to reach it.


Just note that getting the child a BMX with a longer top tube length means that he will be able to ride it for a longer period of time.

When the child is taller replace the 
seat post to one that is laid back.  The increased distance from the saddle to the handlebar will make the child's ride more comfortable.

The carrier on this 20″ wheel size bicycle can handle load as it is welded to the frame. This is a suitable bicycle for a child who rides to school or have to run errands on it.  


Changes can be made to a bicycle to meet the purpose for buying it.  For example, the customer of the above bicycle, opt to attached a removable padded rear seat to the bicycle so that she can ferry her younger sibling. The original saddle was replaced with one that is larger so that seniors in her family can sit on it comfortably. A stem extender was also added to increase the height of the handlebar so that someone taller in the family can ride on it with comfort.

Here is another 20″ wheel size, low cost and low maintenance bicycle to consider getting for children age 6 and adults to ride on.  It looks like a folding bike as its top tube is low. 


If you plan on getting a bicycle for your child to ride to school on, consider getting one with full mudguards installed as it rains all year round in Malaysia. 

Sunday, November 9, 2025

How can I choose the right frame size for my height?

You can do a search online for “bicycle owner’s manual” for the brand that you are interested in getting. There will be a bicycle sizing chart in the manual which you can refer to.

If you refer to (page 9 of) Apollo or Radius Bicycle Owner’s Manual, you will see this “Bicycling Sizing Guide” for their kid’s range of bicycle.


According to the manual, for your safety, as you stand straddling over the toptube, there should be a gap of about 1 inch / 25mm from it to your crotch area. This is to prevent you from hitting the toptube and getting hurt by it, should you fall forward during an accident.

The sales person at the bike shop you go to should also be able to assist you. However, even without the sizing chart or shop assistance, following through with these steps, will help you to decide on the right frame size, based on your height.

1) Sit on the saddle of the bicycle you are interested in buying. Place your hands on the handlebar. Do you feel that you are leaning way too forward?
Note: If it is and you still like the bike, you can request the bicycle shop to change a stem with a shorter reach or replace it with one which is adjustable so that you can raise the handlebar nearer to you.

2) As you sit on the saddle, are your feet sitting flat on the floor? Raise the seatpost up so that only the tips of your shoes are touching the floor.
Note: Sometimes, the bike shop may have to change the seatpost if it can’t be pushed down any lower. The bolts installed for the cage could be blocking the way. This can be resolved if a seatpost of shorter length is installed.

3) Now get off the saddle and straddle over the toptube. Is your crotch area touching it?
Note: If it is, ask the shop to let you try one with a smaller frame size. Example, if a 16″ to 17″ frame size (M size in Asia) is too high for you, you may have to try a frame size of 15″ (S size in Asia). Anything above 18″ is L size in Asia. The size of the frame is usually printed on seat tube, sometimes just below the toptube.

If you are checking on frame size because you plan to buy your bicycle online, you will find some of the points at the following link useful:

Can a quality bike be purchased online? What are the dos and don'ts?

Can a quality bike be purchased online? What are the dos and don'ts?

There are many things you cannot do when buying a bicycle online. Unless you can find a shop that sells the same model and size, you cannot sit on it to see if the bicycle fits you comfortably. You cannot straddle over the toptube to feel if it is too high for your safety.

I have in my shop, bicycles of different brands. My customer tried two 27.5” MTB of different brands with M size frames and similar length stems. He discovered that the reach for the handlebar for one of them is a little too far for his height.

Sometimes the colour of the bicycle you see on the catalouge or online maybe slightly different to the one you received. One of my customers rejected a bicycle I specifically ordered for him because it looks more purple than blue, as seen on the photo I showed him.

Bicycles you buy online are usually delivered in a box partially fixed. Do you have the tools and the capability to fix it up to ride? Some manufacturers will void warranty on defective parts if their bicycles are not fixed up by a bike mechanic.

These were some of the issues faced by my customers who bought their new bicycles online:

1) Missing parts.

2) Gears need to be set.

3) Rear derailleur need to be changed.

4) Hydraulic disc brakes not working well.

The most common issues which cannot be fixed were deep scratches on bikes and damaged decals. We can only help our customers fix minor scratches with paint pen if the scratched part is in black or white colour.

We usually inform our customer that there are warranties on some parts for new bicycles. However, most of them do not want the hassle of sending their bicycles back for warranty repair as it may be more costly or time consuming, especially if the store is a great distance away. Moreover, once their trust in the supplier is broken, it is not likely that they will trust them to get the problem fixed with no additional cost, as they have promised.

As a bicycle shop owner, we sometimes received bicycles with defects from the appointed distributor. We can have them returned for replacement or credit note or sell them with discount if the defects are minor or can be fixed.

If you plan to buy a bicycle online, make sure that you select a supplier who is established in this line. You may have a problem returning a bicycle you are not happy with for replacement if the online supplier is not the appointed seller. So, there is also a reason to doubt if the brand is really authentic or just a brand you like printed on the body without the warranties it should come with.

How to get on and off a bike?

 This was how I was taught to mount a bicycle:

-stand on the left side of your bicycle
-place your left leg on the pedal
-push the ground with your right leg to move your bicycle forward
-as the wheels build up momentum, lift up your right leg over to the right pedal
-start pedaling

You can watch this technique being taught 58 seconds into the video. Seth of Berm Peak called it the “step and swing” method. He also shared many other methods which you can check out.


This is how I was taught to dismount:

-lift up your right leg over to the left side of your bicycle
-as you brake to slow down, put your right leg on the ground to help slow it down further
-your right leg should be firmly on the ground once your bicycle slow down to a stop
-you can now step off the left pedal

You can watch this method 1 minutes into this video. It is called the “high style” by the instructor, Guillaume Guerard.

How can I stop my hydraulic disc brakes from squeaking?

Is your bicycle new?  I usually share this video with customers who recently bought their bicycles with disc brakes. It shows the bed-in process to stop the squeaking noise on braking.


However, if you do not have a problem with your disc brake before, it is likely that the rotors and disc pads have been contaminated. It happens when you accidentally sprayed lubricant on the rotors or you may have ridden over puddles of water that may have oily residue in them. Watch this video to learn what other issues you maybe facing and how you can eradicate them.


Watch this if you really need to remove the disc pads and clean up the area where they are inserted.

How do you choose the perfect cover to cover and protect a bike?

The best way to protect a bicycle is to place it in a bag.

Check out these bags for folding bikes. Most of the time, they are made for 20″ wheel size foldies.


You can also find bag for folding bikes that can be folded. This model comes packed in a bag which you can hang on the handlebar when not in use.

There are also similar looking models that are installed with rollers at the base to ease moving the bicycle around.

You can also find hardcase bags for bicycles in larger wheel size like this.


It is large enough to store a bicycle in wheel sizes of 26″ up to 700C. When bicycles are stored in such bags, the wheels are removed to be packed in a separate compartment.

This cover is a cheaper way to protect a bicycle.


As it lays open at the bottom, dirt and rain water can still get to it. The wheels can also be stained with dirty water when the floor it is parked on is being cleaned. Overtime rust will appear on some of the parts. So, when the bicycle is stored in this manner for a period of time, some cleaning up will still be required when it is time to ride on the bicycle again. For long term storage, it is best that the bicycle is located in an enclosed area to protect it from the elements of nature.

If you plan on not cycling your bike for a long period of time,  it is best that you find ways to hang up your bike to protect the tyres and tubes. This is because after 2 weeks or so, your tube will slowly deflate and your rims will sit on the tyres causing it to crack. The weight of the bicycle sitting on the deflated tubes may even damaged them.


It would be best if you could find a friend to ride your bicycle now and then while you are away. But if you can’t, make sure that you lubricate your bike properly before storing it away.

You may find the additional information at the following links useful in helping you keep your bicycle in good working condition:


What are the best tips to maintain a bike in the proper way? 

What are the best tips to maintain a bike in the proper way?

When you buy an equipment, a manual will be provided with it. A good manual will provide instructions on how to install the equipment correctly. It will provide information on how to use it safely and maintain it so that it will run efficiently.

Even though not all brands/retailers for bicycles will provide such a manual, if you google “owner's manual for bicycle” you should not have any problem in finding one online. From it, you can even learn if you are getting the right frame size for your height.

Though you get your bicycle fully assembled from your bike shop, in the manual you will learn how it is assembled and the type of tools and the sizes you need to do the job. That way if any of the parts are loosen, you will know how to fix it back correctly and with the right tools.

You will learn the name of the parts on the bicycle which will enable you to tell the mechanic clearly what needs to be fixed if professional help is required. I like this image extracted from an old manual for Centurion Road Bike:  


A manual also provides a schedule on when and what on your bicycle should be cleaned, serviced and lubricated. It also inform you what you should not do with it. Eg, here is a tip on how to set your gears so that you will not wear out your chain earlier than it should.


I like the instruction manual provided by Green Line for its Single-speed and Multi speed Beach Cruisers, it provides very clear information with lots of images.


The link to ”Owner's Manual Single Speed and Multi-Speed Bicycles” from Dynacraft Bikes is also very good.

If you take the time to read the manual, you should not have any problem maintaining your bicycle in a proper way.

Saturday, November 8, 2025

How do we protect bicycle tyres from cracking?

Avoid doing things to your tyres that will age and dry them out and cause them to crack.

You should:

1) keep bicycle indoor to avoid exposure to the sun's heat or rain.

2) use the proper air pressure in your tyres to prevent overstretching them out.

3) not wash your tyres excessively with chemical cleaners that will remove waxes and other chemical compound the manufacturer used to protect the surface. If you like your tyres looking clean and new, shop around for polish or wax for tyres that will protect or prevent dirt and mud from sticking to them easily.

4) ride on your bicycle regularly so that the tyres are stretched to maintain their flexibility.

5) inflate the tyres at least every 2 weeks even if you are not cycling your bicycle.

6) remove the wheels from your bicycle and hang them up if you do not plan to cycle for a long period of time. This is to prevent weight of your bicycle from sitting on the tyres.

You can also find other ways to store your bicycle. My customer bought this ceiling hooks from our bike shop to hang his bicycle up in his parent’s home. He rides it only when he is free during the weekends.


You can also check out bike shops to learn how they hang their bicycles for display. This was how we displayed our bicycles at our former bicycle shop.


These are some of the storage racks for hanging bicycles up, that you should be able to find in the market.This rack is suitable for those with more than two bicycles to store, as additional holders can be purchased separately.


This rack is suitable for those with more than two bicycles to store, as additional holders can be purchased separately.

If you have to keep it outdoor, make sure that it is properly covered to protect it from the exposure of rain and sun.

You can also find such covers in shops selling motorbikes but I noticed that there are usually priced higher there than at a bike shop.

When should you apply lubricant on your bicycle?

The best time to lubricate the moving parts of your bicycle, which includes your chain, is right after you clean it, especially, after cycling in wet or dusty condition.

According to instruction manual from Cylion the manufacturer for “Multifunction Chain Cleaner” and chain cleaning agents, it is recommended that you clean your bicycle after every 100km of riding.

However, if you look at your bike manual, you will see that there is a schedule for you to clean and lubricate the moving parts on your bicycle with grease, lubricant and chain lube.


So, even if you have not cycled for a while, you should try to follow the schedule to prevent rust and corrosion.

Grime and grit on moving parts will cause friction. You will know that you have to lubricate them when you feel that your ride is less “smooth” than usual. So, it is alright to lubricate them more often then scheduled. Use wet lube if you tend to ride in wet and dusty condition.
This schedule is a page from the “Bicycle Owner’s Manual” for Apollo bicycles.
If you do not have a manual, you can google “owner's manual for bicycle” to find one online.

The first thing you should do, if you have not lubricated your bicycle since day one you ride on it, is to wash the drive train. That will be the chain and the components that it runs through. Hose off any dirt sticking to the parts first then wipe it dry with a towel before you lubricate the chain and all the moving parts.

There are many type of cleaning set in the market. Here is one of the models from Super B.


Some cleaning agents and sets come with instruction on its packaging which will give you an idea how your drive train should be cleaned. I always keep a copy of such for product sold in my shop. This one is from Cylion.


If you do not want grit to stick to recently lubricated bike, it is best not to over lubricate parts to prevent dirt build up. For best results, you can lubricate your chain 24 hours ahead of your ride to allow liquid carrier of the lube or lubricant to evaporate. Before you ride, wipe off any access that you see. That way your drivetrain will stay cleaner after each ride.

Be careful when spraying lubricants to avoid getting any on your brake disc rotor or pads. You will know that it has been contaminated if you can hear a squealing sound when you brake. You can clean the rotor with a degreaser or rubbing alcohol to stop the annoying sound. As a last resort, you can use soap and water.

Sunday, December 8, 2024

Learn how to remove decals on your bicycle

An 18" wheel size bike is perfect for a six years old child if he or she is not tall enough yet for a 20" wheel size bike.  He is likely too tall for a 16" wheel size bicycle, which is possibly what he or she is currently cycling on.

Recently, my disbutributors have 18" wheel size bicycles to offer and I have been stocking them for the bike shop.  These are some models available.


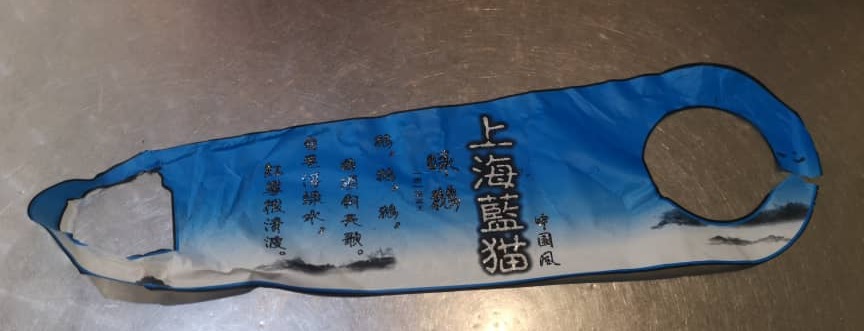
Yesterday, a six years old child came with his parents and grandparents to select a bicycle for his birthday.  It will be a gift from his grandparents.  He likes the above 18" wheel size bike in blue.  However, both the parents and grandparents objected because there were lots of Chinese writings on the bicycle. 

I told them that they should be able to remove the decals on the frame and mudguard by heating over them with a hair dryer.  In the end, they opt to go to another bike shop to try to find another bike to his liking.  

I could tell that the child likes the bike very much so I took the trouble to remove the stickers today.  As I heated the decal with the hair dryer and it loosen up, I used the flat of a knife to push it out further.


It took me sometime to remove them as I also need to remove the sticky residue left behind by using an insulation tape.


I have done my best and I am sure his family members will no longer have any objections to his choice.  I hope to see you back for this bike, kid. 


According to a test ran by The Kitchn, the easiest way to remove sticky stickers is by using vinegar. This is how you should do it:

-soak a paper towel with vinegar.
-place it over the sticker.
-depending on thickness of stickers, let it sit for 5 up to 15 minutes.
-try lifting the sticker off the surface after 5 minutes. 
-leave paper towel with vinegar to sit for a bit longer if it is still difficult to remove the decals.

This information is very useful for parents who bought a pink bike for their daugther whose younger sibling is a boy.


They can remove the pink or girlish decals by following the above instructions I have provided when it is time to pass the bike down to their son.